¶ Take out spindle
First the spindle needs to be taken off from the machine.
Remove the head cover.
Loosen up these screws
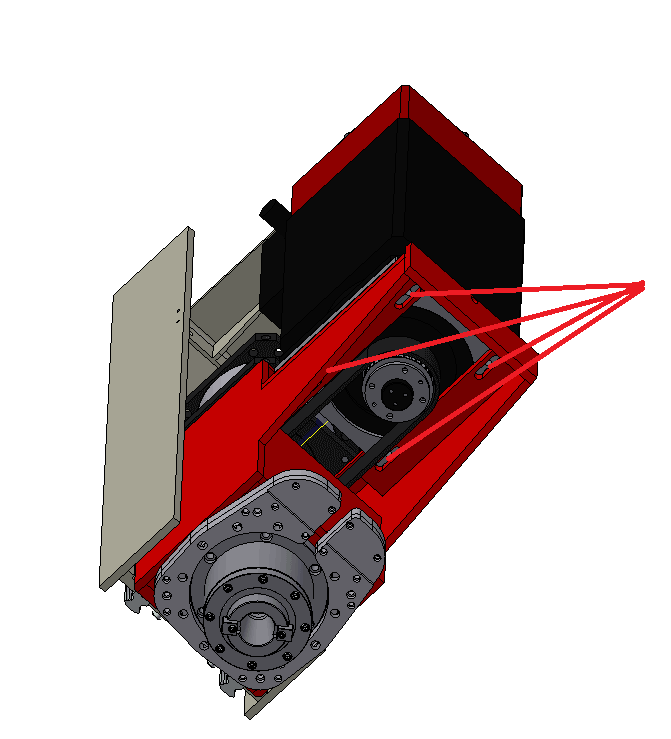
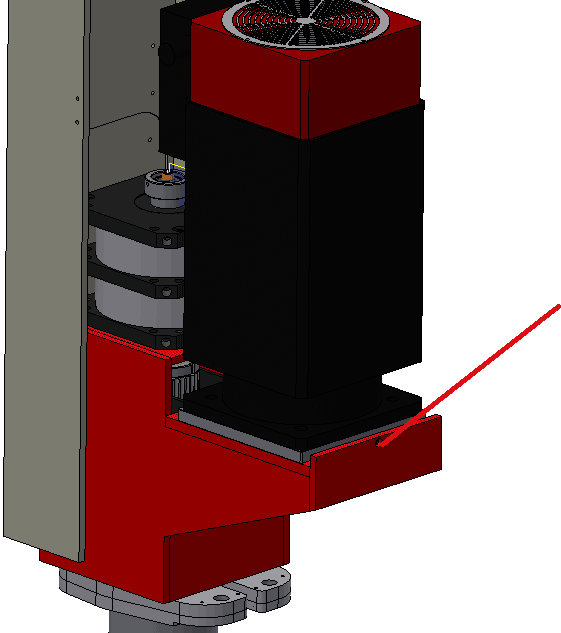
and then loosen up also the screw in the front to release belt tension
After the belt is loosen up, take off the screws that hold the spindle.
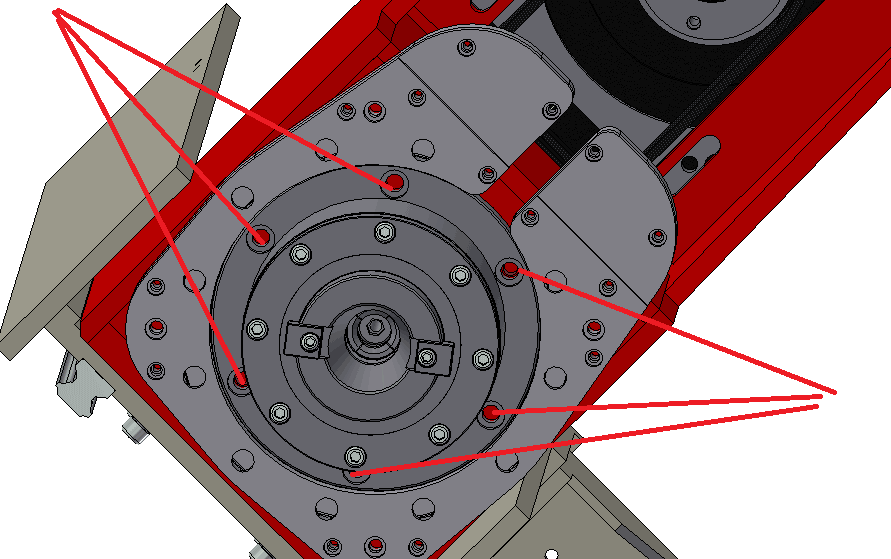
Maybe 6 or 8 screws depending on the spindle model.
As you take off the last screw, the spindle may start to come out, so go as low as possible with the Z axis and place a wood or something to cushion the fall, if after removing the screws the spindle doesn't come out, press the clamp button to release tools, and the spindle should drop out, if it doesn't yet, make leverage from the top of the spindle to push it out, once it's out and sitting on the cushion, then you can lift the Z axis and you will be able to get the spindle and put it on a working table to open it up.
On top of the spindle there is the water seal casing, pull out the water seal casing from the spindle.
¶ Replace gripper AKA retention clamp
If you are replacing the whole spindle you can skip to the next paragraph
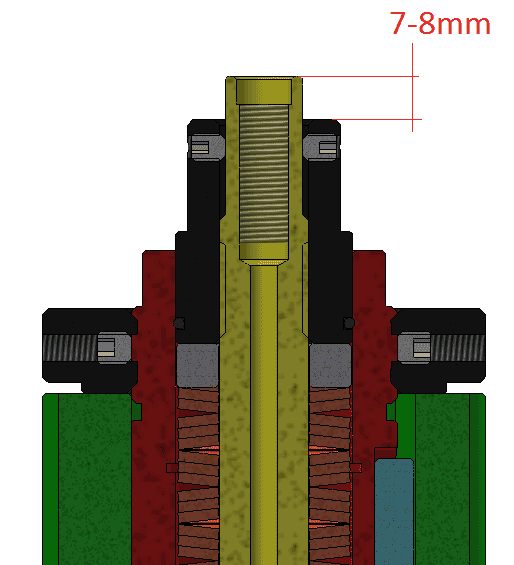
Measure with a caliper, how far the shaft of the pull bar is sticking out from the nut below, should be around 7 or 8 mm, write down the measurement, because you will have to check it again later.
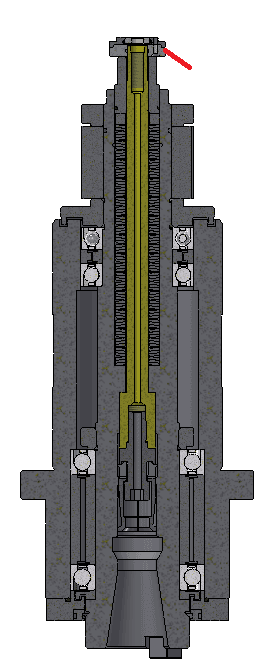
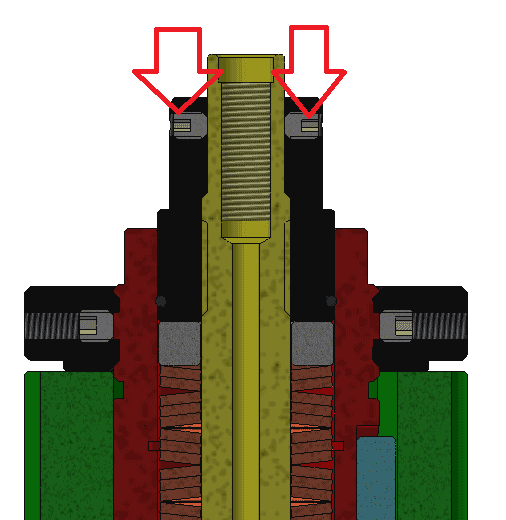
Use a small Allen wrench to loosen up the set screws
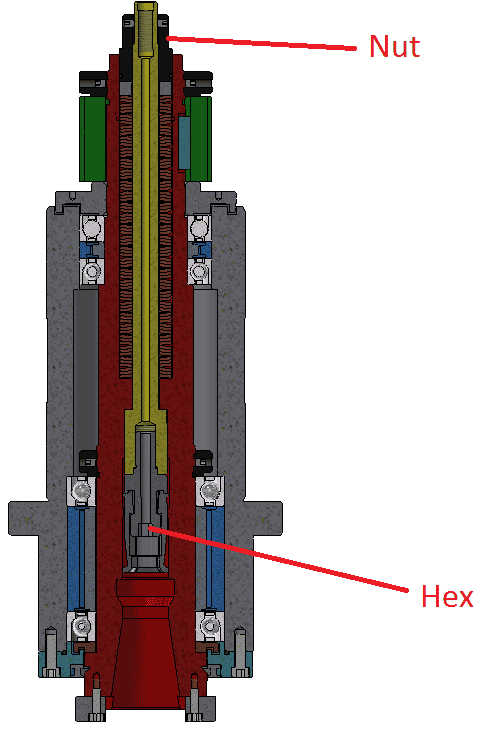
Then you can take off the nut, you will have to stop the spindle from the front side, you need an Allen wrench size 8 to be able to do so, you need to insert it from the cone side (note do not flip the spindle upside down, or if you do mind that the spindle is full of washers and they will drop out)
Once the nut is loosen, you can push out the yellow shaft in the pic, you can then replace the petals, and only the petals on the clamp, they pop out if you pull them out from the tip, then insert 4 new ones, even the ones that did not break, look out because there is a black rubber ring, that ring has to be placed the same way, it kinda makes the petals snap in and force them to stay opened

Once you have replaced the petals you can close the spindle up again.
¶ Load spindle in the machine
Insert back the shaft with new petals from the bottom of the spindle, and then tight again the nut using the shaft to nut measurement as your reference, then lock the set screws you removed at the beginning!
Place the water seal again on top of the spindle!
Insert the spindle in the machine, go down with the Z and slowly to align it properly, as you go up mind that the belt should be in a good position, otherwise you'd have to drop the spindle out again, then lock the spindle again with the screws.
Once it's locked in position tight the belt again and lock the motor in position, to test spindle belt tightness spin at 6000 RPM and adjust tightness till the sound is proper, also stop and feel the tightness with your hands it should not be as tight as a violin cord, rather it should become tight just as soon as you start squeezing it with your hand, it should let you squeeze the belt for 5-10 mm between your fingers.
Once the belt is tight you need to check the spindle homing position, you can home the spindle by selecting the A axis from the manual page and pressing the home button on the keyboard, the spindle will spin and stop in a position, that position is the current home position, the home position should have the spindle teeth aligned with X axis to properly too change tools, but they are probably not aligned anymore because we took the spindle off, get an aluminum bar, or something straight to align with the teeth and then judge with the side of the table, or the mill lines on the table if the teeth are aligned, you can take measurements, but if the aluminum bar is long enough an adjustment by eye is good enough for the tool change purpose.
¶ Old drive big black box with MK written in red:
You can adjust the homing position by adjust parameter F22 in the MK spindle driver, open the panel, find the MK spindle driver (big black box with MK written in red on it), press ESC twice, left arrow twice, and up arrow twice, then you can use the arrows to change the parameter, a change of 10000 is a complete round, the parameter should be set between 1000 and 10000, if you need to go lower than a 1000, add 5000 and you will be in the same alignment, once you changed the value of F22 parameter, press enter and then ESC a few times till 00000000 is displayed on the screen of the drive.
You keep homing A checking alignment and adjusting F22 parameter till the spindle is aligned again.
¶ New drive, silver/grey box with MK written on it:
You can adjust the homing position by adjust parameter P54.12 in the MK spindle driver, open the panel, find the MK spindle driver (silver big box with MK written on it), press ESC till you see P0.01, use left arrow and change with up arrow to P54, then left again, and change with the arrows to P54.12, then enter, and enter again to see the value inside the parameter blink and you can use the arrows to change the parameter, a change of 10000 is a complete round, the parameter should be set between 1000 and 10000, if you need to go lower than a 1000, add 5000 and you will be in the same alignment, once you changed the value of P54.12, press enter to confirm and then ESC a few times till run is displayed on the screen of the drive.
You keep homing A checking alignment and adjusting P54.12 parameter till the spindle is aligned again.
Mount the head cover again.
If you followed the instructions you should have the machine ready to go.
If after replacing spindle you experience troubles with loading or releasing tools click here